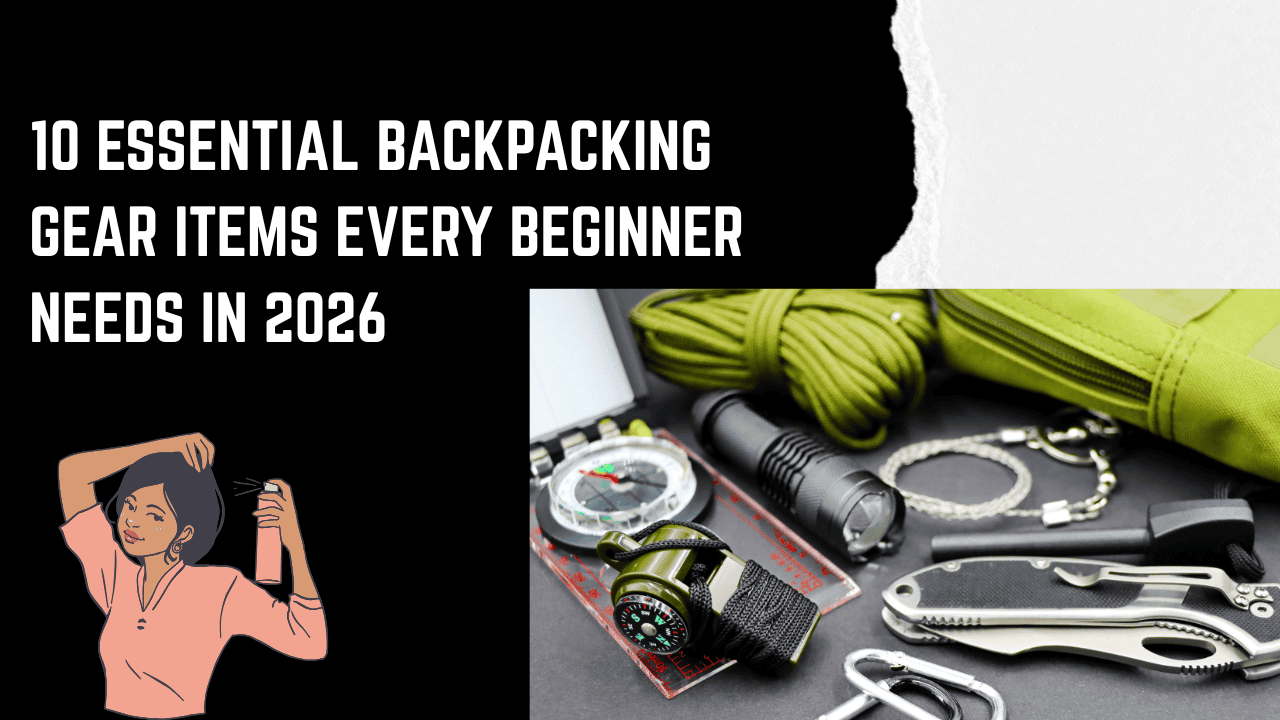
10 Essential Backpacking Gear Items Every Beginner Needs in 2026
There is a moment that every experienced backpacker remembers — the first time they shouldered a pack and headed into the wilderness for more than a day. The excitement, the nervousness, and the overwhelming question: what do I actually need to bring?
The backpacking gear market in 2026 is more innovative, more accessible, and more confusing than ever. Thousands of products claim to be essential. Gear lists span hundreds of items. And the cost of outfitting yourself can feel intimidating before you have even taken a single step on trail.
The truth is simpler than the gear industry wants you to believe: backpacking requires a relatively small number of genuinely essential items — and getting those right matters far more than having every possible accessory.
This guide covers the 10 truly essential backpacking gear items every beginner needs in 2026 — what each item does, what to look for, the best options at every budget, and exactly how to choose what is right for you.
Before the List: The Backpacker’s Mindset
The Big Three: In the backpacking community, the three heaviest and most important gear items are universally called “The Big Three” — your shelter, sleep system, and backpack. These three items account for the majority of your pack weight and the majority of your comfort and safety on trail. Invest here first.
Weight matters: Every gram you carry is a gram you carry for every mile of every day. The difference between a 10kg pack and a 15kg pack is not just 5kg — it is accumulated fatigue, sore shoulders, and reduced enjoyment over time. Prioritize lightweight gear where budget allows.
Buy once, buy right: Quality backpacking gear is expensive — but cheap gear that fails on trail is genuinely dangerous. A tent that leaks in a storm, a sleeping bag that does not keep you warm, or boots that cause blisters are not just inconveniences — they are safety concerns. Buy the best you can afford in the Big Three.
Start with what you have: You do not need to buy everything at once. Many items (clothing, water bottles, trekking poles) can be sourced from everyday life before upgrading to specialist gear.
THE 10 ESSENTIAL BACKPACKING GEAR ITEMS
1. Backpack — The Foundation of Everything
Budget options: $80–$150 | Mid-range: $150–$250 | Premium: $250–$450
Your backpack carries everything — making it arguably the most important single piece of gear you will buy. The wrong pack causes back pain, shoulder strain, and the miserable experience of adjusting your pack every 20 minutes on trail.
What to look for:
Capacity: Measured in litres. For 2–4 night trips: 50–60L. For 4–7 nights: 60–75L. Beginners typically overpack — a 60L pack is sufficient for most beginner trips.
Fit: More important than any specification. A pack must fit your torso length (measure from the C7 vertebra at the base of your neck to your iliac crest hip bones) and adjust properly to your hip width. Most packs come in multiple sizes (S/M/L) based on torso length.
Weight: Heavier packs are more durable but add to your carry weight. Most quality packs weigh 1.3–2kg.
Suspension system: The hipbelt carries 70–80% of your pack weight. A good suspension system transfers weight from your shoulders to your hips — where your legs can carry it far more efficiently.
Best beginner options:
Budget: Osprey Talon 44 ($130) — exceptional value, lightweight, comfortable suspension
Mid-range: Gregory Zulu 55 ($180) — outstanding suspension and organization for the price
Premium: Osprey Atmos AG 65 ($270) — Anti-Gravity suspension eliminates the “hot back” problem
Women-specific: Osprey Aura AG 65 ($270) or Gregory Maven 55 ($200) — designed for female torso geometry and hip anatomy
2. Shelter — Your Home on Trail
Budget options: $100–$200 | Mid-range: $200–$400 | Premium: $400–$700+
Your shelter protects you from rain, wind, cold, and insects — the four elements that can turn a wonderful backpacking trip into a miserable emergency. A good shelter is not a luxury — it is a safety item.
Types of backpacking shelter:
Tent: The most weatherproof and beginner-friendly option. Three-season tents handle rain, wind, and cold down to approximately -5°C. Four-season tents handle snow and extreme conditions.
Tarp: Ultralight but requires setup skill and does not protect from insects. Not recommended for beginners.
Bivy sack: A waterproof bag that surrounds your sleeping bag. Extremely lightweight but claustrophobic and provides no living space.
What to look for:
Weight: For a solo backpacking tent, target under 1.5kg. For a two-person tent, under 2kg is excellent.
Waterproof rating: Look for a minimum 1,500mm hydrostatic head rating. Higher is better.
Setup: Can you set it up in the dark, in rain, when tired? Practice at home first.
Vestibule: A covered area outside the main sleeping space for storing gear. Essential for keeping muddy boots and wet gear out of your sleeping area.
Best beginner options:
Budget: MSR Hubba NX Solo ($350) — premium but worth the investment for reliability
Mid-range: Big Agnes Copper Spur HV UL2 ($450) — outstanding weight-to-performance ratio
Budget-conscious: Naturehike Cloud-Up 2 ($130) — excellent value, adequate for most beginner conditions
3. Sleeping Bag — Your Temperature Management System
Budget options: $80–$150 | Mid-range: $150–$300 | Premium: $300–$600+
Your sleeping bag is your primary tool for staying warm overnight — and getting the temperature rating wrong is one of the most common and most consequential beginner mistakes.
Temperature ratings:
Sleeping bags are rated to a temperature — but the EN/ISO standard distinguishes between:
- Comfort rating: Temperature at which a standard woman sleeps comfortably
- Lower limit rating: Temperature at which a standard man sleeps comfortably
- Extreme rating: Survival limit temperature
Choose a bag rated to the lowest temperature you expect to encounter — and if in doubt, go warmer.
Down vs synthetic:
Down insulation: Lighter, more compressible, longer-lasting, superior warmth-to-weight ratio. Performs poorly when wet — loses virtually all insulating ability. More expensive.
Synthetic insulation: Heavier, bulkier, less durable, lower warmth-to-weight ratio. Retains insulating ability when wet. More affordable.
Recommendation for beginners: Synthetic for wet climates (Pacific Northwest, UK, Scotland). Down for dry climates (Rocky Mountains, Southwest USA, Alps) or if budget allows for a quality down bag.
Best beginner options:
Budget synthetic: REI Co-op Trailbreak 30 ($80) — reliable, affordable, adequate for most summer backpacking
Mid-range down: Marmot Hydrogen 30 ($280) — excellent warmth-to-weight, quality down
Premium down: Western Mountaineering UltraLite ($475) — industry-leading quality and warmth
4. Sleeping Pad — The Underrated Essential
Budget options: $25–$60 | Mid-range: $60–$150 | Premium: $150–$250
The sleeping pad is the most underestimated essential in backpacking — and it is the item beginners most commonly skip or cheap out on, to their immediate regret.
Why your sleeping pad matters more than your sleeping bag:
Your sleeping bag is rated for insulation above you. Below you, your body weight compresses the insulation in your sleeping bag to virtually zero. The cold ground conducts heat away from your body extremely efficiently. Without an insulating barrier between you and the ground — you will be cold regardless of how warm your sleeping bag is rated.
Two types:
Foam pads: Lightweight, inexpensive, completely bombproof (no risk of puncture), limited comfort. Best for beginners on a tight budget or as a backup.
Inflatable sleeping pads: More comfortable, excellent insulation, packable to the size of a water bottle. Risk of puncture (carry a repair kit). Much higher comfort ceiling than foam.
R-Value: The insulation rating of sleeping pads. Higher = warmer. For summer backpacking: R-2 minimum. For shoulder season (spring/fall): R-3 to R-4. For winter: R-5+.
Best beginner options:
Budget foam: Therm-a-Rest Z Lite Sol ($50) — the gold standard foam pad, virtually indestructible
Mid-range inflatable: Nemo Tensor ($130) — outstanding comfort and insulation for the weight
Premium: Therm-a-Rest NeoAir XLite ($200) — the benchmark ultralight inflatable pad
5. Water Treatment — The Non-Negotiable Safety Item
Budget options: $15–$30 | Mid-range: $30–$80 | Premium: $80–$150
Drinking untreated water from natural sources — even in apparently pristine wilderness — risks infection from Giardia, Cryptosporidium, bacteria, and viruses. Water treatment is not optional. It is a fundamental safety item.
Water treatment methods:
Filter: Physical filtration removes bacteria and protozoa (Giardia, Cryptosporidium) but does NOT remove viruses. Sufficient for most North American and European wilderness. Does not work when frozen.
UV purifier: UV light kills bacteria, protozoa, AND viruses. Requires batteries. Effective for visually clear water only.
Chemical treatment (iodine/chlorine tablets): Lightweight and cheap. Treats all pathogens including viruses. Slow (30 minutes). Leaves taste. Last resort option.
Purifier (not just filter): Removes bacteria, protozoa, AND viruses. Recommended for international travel and developing world water sources.
Recommendation for beginners:
Carry a primary filter AND backup chemical tablets. The combination covers all failure scenarios.
Best beginner options:
Most popular: Sawyer Squeeze ($35) — lightweight, filters 1.8 million litres, squeeze-through use or inline with hydration bladder
UV option: SteriPen Ultra ($90) — fastest treatment (90 seconds per litre), treats all pathogens
Comprehensive purifier: Katadyn BeFree ($45) — squeeze filter for everyday use, easy to clean
6. Navigation — Know Where You Are
Budget options: $5–$30 | Mid-range: $30–$80 | Premium: $400–$700
Getting lost in the wilderness is a genuine emergency — and the proliferation of smartphones has created a dangerous overconfidence in technology that fails when batteries die, signals disappear, or screens crack.
Navigation toolkit:
Paper map: A topographic map of your trail corridor is the most reliable navigation tool available. It never runs out of battery. It survives rain. It works in any condition. Always carry one.
Compass: A quality baseplate compass used alongside a topo map provides all the navigation capability you need. Learn to use it before you need it.
GPS device: Dedicated GPS units (Garmin inReach, etc.) are more reliable than smartphones, have longer battery life, and many include two-way satellite messaging for emergency communication.
Downloaded offline maps: If using your smartphone, download maps for offline use (Gaia GPS, AllTrails Pro, CalTopo) before leaving cell coverage. Use airplane mode to conserve battery.
Non-negotiable: Always carry paper map + compass as backup to any electronic navigation.
Best beginner options:
Compass: Suunto A-10 ($20) — reliable baseplate compass for beginners, accurate and durable
GPS/Safety: Garmin inReach Mini 2 ($350 + subscription) — two-way satellite messaging enables SOS communication and location sharing from anywhere on Earth
Smartphone app: Gaia GPS ($40/year) — best offline trail maps for North America
7. First Aid Kit — Prepared for the Unexpected
Budget options: $20–$40 | Mid-range: $40–$80
Medical help in the wilderness is hours or days away. A well-stocked first aid kit — and the knowledge to use it — is genuinely life-saving equipment.
Essential first aid kit contents:
Wound care:
- Adhesive bandages in multiple sizes
- Sterile gauze pads
- Medical tape
- Blister treatment (Moleskin, Leukotape, or similar)
- Antiseptic wipes
- Wound closure strips (Steri-Strips)
Medications:
- Ibuprofen and acetaminophen (pain relief and anti-inflammatory)
- Antihistamine (allergic reactions)
- Antidiarrheal medication
- Antacids
- Personal prescription medications
Tools and other:
- Medical scissors
- Tweezers (for splinters and ticks)
- SAM splint (for sprains and fractures)
- Emergency thermal blanket
- Nitrile gloves
- Wilderness first aid reference card
Best beginner options:
Pre-assembled: Adventure Medical Kits Ultralight Watertight .7 ($40) — excellent contents for solo hiking, well-organized, waterproof
Comprehensive: REI Co-op Backpacker First Aid Kit ($60) — more comprehensive, suitable for groups
Important: A first aid kit is only useful if you know how to use it. Consider a Wilderness First Aid (WFA) course — two-day courses teach essential backcountry medical skills and are invaluable for regular backpackers.
8. Cooking System — Fuel for the Trail
Budget options: $20–$50 | Mid-range: $50–$120 | Premium: $120–$250
Hot food and drinks are more than comfort on trail — they are morale, recovery, and warmth. A lightweight cooking system transforms your backpacking experience.
Cooking system options:
Canister stove: The most popular beginner option. Screws directly onto a fuel canister. Fast, simple, and reliable. Limited performance in very cold temperatures.
Alcohol stove: The lightest and cheapest option. Slow boil time, affected by wind, no flame control. Best for ultralight backpackers willing to sacrifice convenience.
Wood-burning stove: Burns natural wood found on trail — no fuel to carry. Slow, produces smoke, often prohibited in fire ban areas.
Integrated canister system (Jetboil): Stove and pot in one insulated unit. Extremely fast boil time. Less versatile for cooking (optimized for boiling only).
The minimalist system for beginners:
- MSR PocketRocket 2 stove ($45) — reliable, windproof, fast
- MSR Alpine Stowaway 750ml pot ($35) — lightweight titanium, fits everything
- Fuel canister (available at most outdoor retailers)
- Long-handled spork ($5)
Best beginner options:
Budget: BRS-3000T stove ($15) + any lightweight pot — functional but lacks wind resistance
Mid-range: MSR PocketRocket Deluxe ($60) — pressure regulation maintains performance as canister empties
All-in-one: Jetboil Flash ($110) — fastest boil time, most convenient for beginners
Best Hiking Backpacks Under $150 in 2026 The Complete Buyer’s Guide
9. Headlamp — Light When You Need It
Budget options: $15–$30 | Mid-range: $30–$60 | Premium: $60–$100
A headlamp is one of the most important and most affordable pieces of safety equipment in your pack. You WILL need it — whether for navigating to the bathroom at 2am, setting up camp after a long day, or navigating in unexpected darkness.
What to look for:
Lumens: Brightness. 200–300 lumens is sufficient for most backpacking. Higher lumens drain batteries faster.
Battery life: Real-world battery life on the brightness setting you actually use. High brightness drains batteries 5–10x faster than low settings.
Weight: Most headlamps weigh 80–120g. Ultralight options exist under 60g.
Water resistance: Look for IPX4 minimum (splash resistant) for backpacking. IPX7 (submersible) is better for wet conditions.
Red light mode: Red light preserves night vision and does not disturb others at camp. Look for a headlamp with a dedicated red light mode.
Rechargeable vs battery: Rechargeable headlamps are increasingly popular but require charging infrastructure on longer trips. Traditional AAA/AA battery models are more versatile for extended wilderness travel.
Best beginner options:
Budget: Black Diamond Spot Lite 200 ($25) — reliable, 200 lumens, red light mode, water resistant
Mid-range: Petzl Actik Core ($50) — rechargeable, 450 lumens, red light, IPX4
Premium: Black Diamond Spot 400-R ($60) — 400 lumens, rechargeable, excellent real-world performance
10. The Ten Essentials — Emergency and Safety Items
Budget options: $50–$100 total for the category
The “Ten Essentials” is a framework developed by The Mountaineers in 1930 that has guided outdoor safety for nearly a century. Beyond the specific items above, every backpacker should carry these safety essentials.
The Ten Essentials (systems approach):
- Navigation ✅ (Covered above — map, compass, GPS)
- Sun protection — Sunscreen SPF 50, sunglasses (UV400), sun hat
- Insulation — Extra clothing layers for unexpected cold (covered in clothing recommendations)
- Illumination ✅ (Headlamp — covered above)
- First aid supplies ✅ (Covered above)
- Fire starting — Lighter, waterproof matches, fire starter (fatwood or tinder)
- Repair tools and knife — Multi-tool or knife, gear repair tape (Tenacious Tape), safety pins
- Nutrition — Extra day’s worth of food beyond your planned meals
- Hydration ✅ (Water treatment — covered above)
- Emergency shelter — Emergency bivy or space blanket ($10–$30)
The non-negotiable emergency additions:
Knife or multi-tool: A quality folding knife or multi-tool is one of the most versatile tools in the backcountry. The Victorinox Swiss Army Knife ($25–$80) provides the most practical tool set for backpacking.
Fire starting: Carry three methods: disposable lighter, waterproof matches in a waterproof container, and a fire starter (ferro rod or fatwood sticks). Fire starting capability in an emergency can be life-saving.
Emergency communication: For serious backcountry travel — a personal locator beacon (PLB) or satellite communicator (Garmin inReach Mini) is the most important safety investment you can make. These devices send your GPS coordinates to rescue services from anywhere on Earth, requiring no cell signal.
- PLB: One-way SOS only (ACR ResQLink, $300) — purchase once, no subscription
- Satellite communicator: Two-way messaging + SOS (Garmin inReach Mini 2, $350 + subscription) — communicate with anyone from anywhere
Your Complete Beginner Backpacking Kit: Budget Summary
Budget Build (total approximately $500–$700):
- Backpack: Osprey Talon 44 ($130)
- Tent: Naturehike Cloud-Up 2 ($130)
- Sleeping bag: REI Trailbreak 30 ($80)
- Sleeping pad: Therm-a-Rest Z Lite Sol ($50)
- Water filter: Sawyer Squeeze ($35)
- Cooking: BRS stove + pot ($30)
- Headlamp: Black Diamond Spot Lite ($25)
- First aid kit: Adventure Medical Kits ($40)
- Navigation: Paper map + Suunto compass ($30)
- Ten Essentials (knife, fire, emergency blanket): ($50)
Mid-Range Build (total approximately $900–$1,200):
- Backpack: Gregory Zulu 55 ($180)
- Tent: MSR Hubba NX Solo ($350)
- Sleeping bag: Marmot Hydrogen 30 ($280)
- Sleeping pad: Nemo Tensor ($130)
- Water: Katadyn BeFree ($45)
- Cooking: MSR PocketRocket Deluxe + pot ($95)
- Headlamp: Petzl Actik Core ($50)
- First aid: REI Backpacker Kit ($60)
- Navigation: Map + compass + Gaia GPS ($60)
- Ten Essentials: ($60)
Gear You Do NOT Need as a Beginner
Skip for now:
- Trekking poles (useful but not essential — borrow before buying)
- Camp shoes (heavy, add weight unnecessarily)
- Satellite communicator (for day hikes and developed campground trips — essential for true backcountry)
- Bear canister (required in some areas — check regulations for your specific trail)
- Camp pillow (stuff your fleece into a pillow case instead)
- Water bottle with built-in filter (buy a dedicated filter instead)
The Most Important Advice for Beginner Backpackers
Practice at home: Set up your tent in the garden before the trip. Practice using your stove. Test your sleeping system in cool temperatures before relying on it in the wilderness.
Start small: Your first backpacking trip should be 1–2 nights, close to a trailhead, on a well-marked trail with predictable weather. Build from there.
Hike with someone experienced: The single best way to learn backpacking is alongside someone who already does it. Their experience shortcuts years of learning.
Weigh your pack: A loaded pack should weigh no more than 20–25% of your body weight (lighter is always better). Weigh it before every trip and ruthlessly eliminate anything unnecessary.
Leave No Trace: Pack out everything you pack in. Camp on durable surfaces. Dispose of human waste properly (learn the cathole method). Respect wildlife. Leave what you find. The wilderness you love depends on everyone practicing these principles.
Best Hiking Backpacks Under $150 in 2026 The Complete Buyer’s Guide
Final Thoughts
Backpacking is one of the most rewarding experiences available to anyone willing to take that first step into the wilderness with a pack on their back. The gear in this guide is not about luxury or excess — it is about safety, comfort, and the confidence to go further, stay longer, and return safely.
Start with the Big Three. Add safety essentials. Build from there as your experience and ambitions grow. The most expensive gear in the world will not make you a better backpacker — experience, knowledge, and preparation will.
Get your gear. Hit the trail. The wilderness is waiting.