One of the worst possible camping experiences is waking up to a puddle in your tent. If you’re camping in the rain, you’ll want to make sure that you have a waterproof a tent or rainfly with you.
Most quality tents come with a waterproof layer or a separate waterproof rainfly. However, even the best waterproofing will degrade over time, particularly if it becomes dirty. When the time comes or if you have a non-waterproof tent, use these steps to make sure all your camping experiences are comfortable and dry.
Why You Need a Waterproof Tent

During one of my first camping experiences, it rained the entire night. I’d borrowed a tent and the waterproofing had clearly not been checked recently, because I spent all night avoiding puddles and praying that my sleeping bag didn’t get too wet. Needless to say, it was not a very restful night.
To make sure this doesn’t happen to you, this article will show you how to waterproof a tent and make sure you stay dry, even during a downpour.
There are three areas of your tent where water can get in: seams, the urethane coating, and the durable water repellent (DWR).
In this article, I’ll provide information on the gear you need and step by step instructions on how to waterproof or re-waterproof each of these sections.
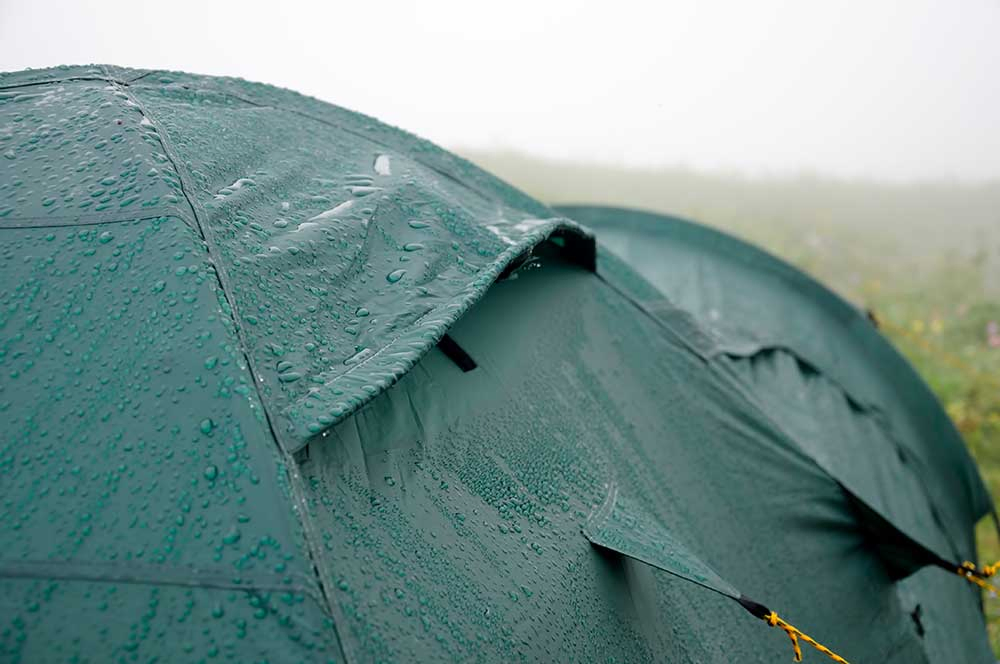
Sealing Tent Seams
The seams of your tent are where the fabric connects — this is often the most likely culprit for a leaky tent. Here, I’ll show you how to seal off seams to make sure that they’re waterproof.
What You Need
- A rag
- Rubbing alcohol
- Seam sealer
- There are different types of seam sealers for different fabrics, so you’ll want to check what kind of fabric your tent is made from to ensure you get the right sealer. You can usually find this information from your tent’s manufacturer.
- Most tents use polyurethane-coated fabrics, in which case Gear Aid’s Seam Grip +WP is a good choice. This comes with a brush for application, which you’ll need if your seam sealer doesn’t come with one.
- Some tents use silicone-treated fabric, in which case Seam Grip +SIL is a good option.
- Gloves (optional)
- Drop cloth for spills (optional)
Step 1: Erect Your Tent Inside Out
The easiest way to seal the seams of your tent is to erect your tent inside out in order to access all the seams. This also goes for your rain fly and bottom tarp, if you have these. If you’re using a drop cloth, set the tent up over the cloth.
Make sure to erect your tent in a dry, open area with plenty of light and airflow. Ideally, the best place to do this is in a dry, shaded area outside, so you can avoid breathing in any of the sealer fumes.
Step 2: Wipe Down The Seams
Wipe each seam with your rag and some rubbing alcohol in order to remove any dust or dirt in the seams. If you notice any peeling seam tape, you can also gently remove this, but leave any tape that’s still intact.
Note: if you don’t have rubbing alcohol, you can just use water, although rubbing alcohol adds a bit of extra cleaning power.
Step 3: Apply Sealer to the Seams
Apply the sealer evenly to all the seams on your tent, rainfly, and ground tarp. Make sure to apply the sealer on the inside of your tent (this is why you erect the tent inside out). Use an old paintbrush or the brush which comes with your sealer to cover all parts of each seam.
Step 4: Allow Sealer to Dry
Allow the sealer to dry in a shaded area. For extra strength, you can add a second layer of sealer once the first layer has dried, after a few hours.
If you add a second layer, make sure you allow the sealer to dry completely before putting the tent away. The time this takes depends on the sealer you use, but it generally takes between 6 and 12 hours.
Refreshing Your Tent’s Urethane Coating
Your tent’s urethane coating is the layer on the underside of the fabric which acts as the primary defense against water. If your tent has stuff flaking off on the inside, it’s probably a good sign that you need to give your tent a new urethane coat.
What You Need
- A sponge with an abrasive side
- Rubbing alcohol
- Tent sealant which matches your tent fabric
- As with the seam sealer, check what type of fabric your tent is made from in order to ensure you purchase the correct sealant.
- For polyurethane coatings, Gear Aid’s Tent Fabric Sealant is a solid choice.
- For silicone coatings, choose Sof Sole’s Heavy-Duty Silicone Waterproofer.
Step 1: Prep Your Tent
Lay out your tent and/or rainfly with the flaking side face up. You should set up in a dry space with plenty of airflow where you can leave it undisturbed for a full day. Use your sponge and rubbing alcohol to scrub off the flaking coating.
Step 2: Apply New Sealant
Follow the instructions of your sealant when applying a coating. With Gear Air Tent Fabric Sealant, use the sponge applicator to apply a thin layer to all the fabric you’re waterproofing.
Step 3: Allow to Dry
Allow the coating to dry for at least 24 hours before packing your tent away.
Refreshing a Tent’s DWR

The durable water repellent is the coating on the outside of your tent which causes liquid to bead up and roll off your tent rather than soaking in. If water (or other liquid) doesn’t bead up on your tent or rainfly anymore, it’s time to add a new coat of DWR.
What You Need
- Water
- Sponge
- Damp rag
- Waterproof spray
- There are lots of different options for waterproof spray. For tarps and rainflies, I recommend Nikwax Tent and Gear Solarproof as it’s easy to apply and offers protection from UV rays.
- For single walled tents without a rainfly, use Nikwax TX.Direct spray on as this provides a more technical, breathable-waterproof coating which you’ll need for a single layer tent.
Step 1: Prep Your Tent
Erect your tent right-side-out in a dry place. A porch or patio is ideal for this.
Next, gently spray or wipe down your tent using a sponge to clean off any dirt or dust. Depending on your tent instructions, you could also wash it in a washing machine.
Step 2: Apply Waterproofing
Use the spray bottle, brush or sponge to apply the DWR. Nikwax Solarproof comes in a spray bottle which is easy to use and apply an even layer. Use your damp rag to wipe away any excess liquid as you go.
Step 3: Let Dry
Allow your tent to completely for 24 hours before packing up or using to give the coating time to set.
Alternative: Use a Rainfly or Tarp
For an added layer of security against rain, you can use a rainfly or tarp over the normal tent body. Along with the added layer of waterproof fabric, a rainfly or tarp allows for more airflow between the fully waterproof layer and your tent body. Airflow stops the tent from becoming too stuffy and reduces condensation in the tent.
Similarly, using a tarp or footprint under your tent also adds extra protection. This extra layer helps your tent base last longer and will help avoid pooling underneath your tent. Make sure your base tarp doesn’t extend out further than your tent floor, otherwise water can build up between your footprint and tent floor.
Get Out There
Now that your tent is fully waterproof, it’s time to get out there and use it! Come rain or shine, you can now confidently camp and rest assured that your tent will keep you dry. When you know your tent will hold up, listening to the pitter-patter of rain while you snuggle up in your sleeping bag is a wonderful experience.
If you enjoyed this tutorial or if you have other recommendations for waterproofing your tent, let us know in the comments section and share it with your friends.
Thank you for your sharing. I am worried that I lack creative ideas. It is your article that makes me full of hope. Thank you. But, I have a question, can you help me?