If you’ve ever thought about buying a teepee tent for your child to play in, you probably know how expensive they can be. But did you know that you can make a teepee tent with just a few simple supplies? It’s easy to accomplish and you could whip one up in a few hours.
Once you know how to make a teepee tent for your kids, you can take the same concepts and make one for yourself too. Imagine the fun you can have in a homemade teepee tent in your backyard. Surprise your children or have them help you with this DIY project.
By the end of this article, you’ll not only know how to make a teepee tent, but you’ll be able to put it together in a short time.
So first, let’s look at the supplies you’ll need to build your teepee tent.
What You Will Need to Create a Teepee Tent
For this no-sew technique, you can buy everything you need at your local hardware store. Take this list with you, so you can get what you need:
- Four – 1 ¾ inch by 6-foot dowel rods
- Some ⅜ inch rope
- Approximately 6 by a 9-foot quality canvas drop cloth
- Three screws
- Three washers
- Scissors
- A lighter
- A drill
Now that you’ve gathered all the supplies, let’s go over how to make a teepee tent step by step.
How to Make a Teepee Tent Step by Step
There are different ways to make a teepee tent for kids. Some require sewing, and some don’t. For simplicity’s sake, we chose a teepee that doesn’t require any sewing. Of course, if you want to add pockets to the inside for toys, those are easy to sew in.
The teepee tent you have to sew requires more steps, but the basic supplies are largely the same. We chose the no-sew option because it takes a little less time, no sewing skills, and the result is just as good if not better.
No matter which way you choose to make a teepee tent, in the end, you’ll have a teepee tent for your little one. To begin this no-sew project, gather your drill, dowel rods, rope, and lighter.
Step 1: Drill Holes in Dowels
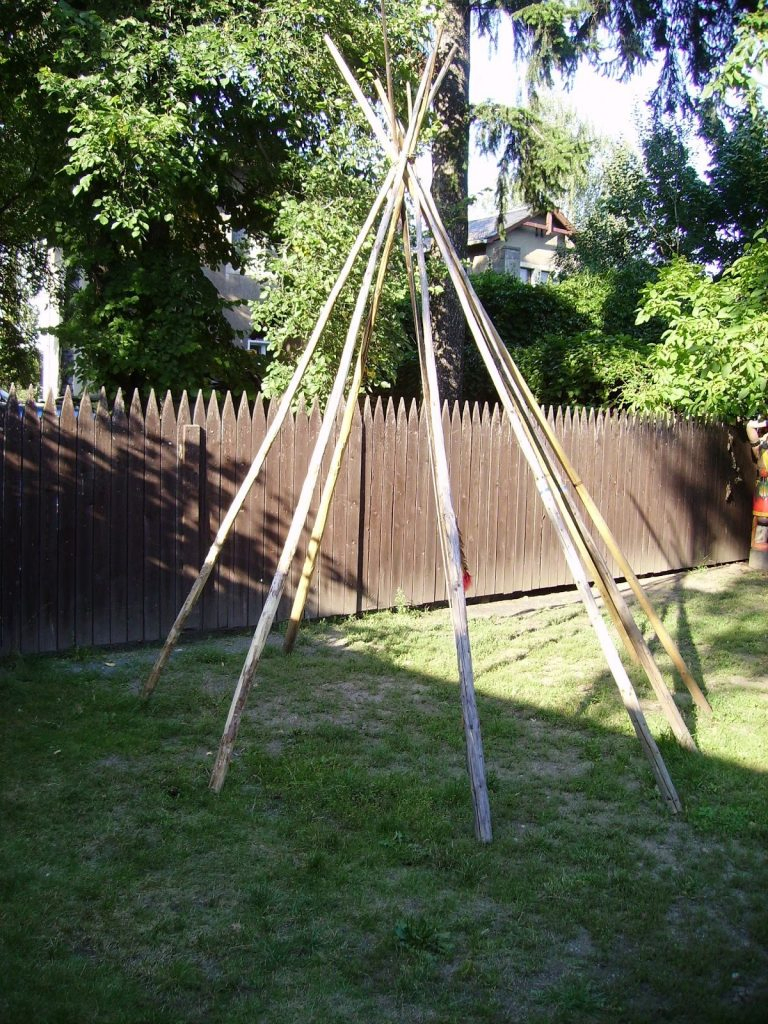
The purpose of this first step is to create the framing of your teepee. The frame will include the dowels and the rope. Cut a long length of rope and singe the end with a lighter, so it doesn’t fray.
Then drill a hole in one of the dowel rods 5 inches from the end. Push the rope through the hole and tie a knot at the end of it so it won’t pull back through the hole. Standing that pole up on its end, take the other poles and arrange them in a teepee shape.
Mark where the poles intersect with one another and drill holes in them one by one, adjusting the marks as you go.
Step 2: Wrap it up
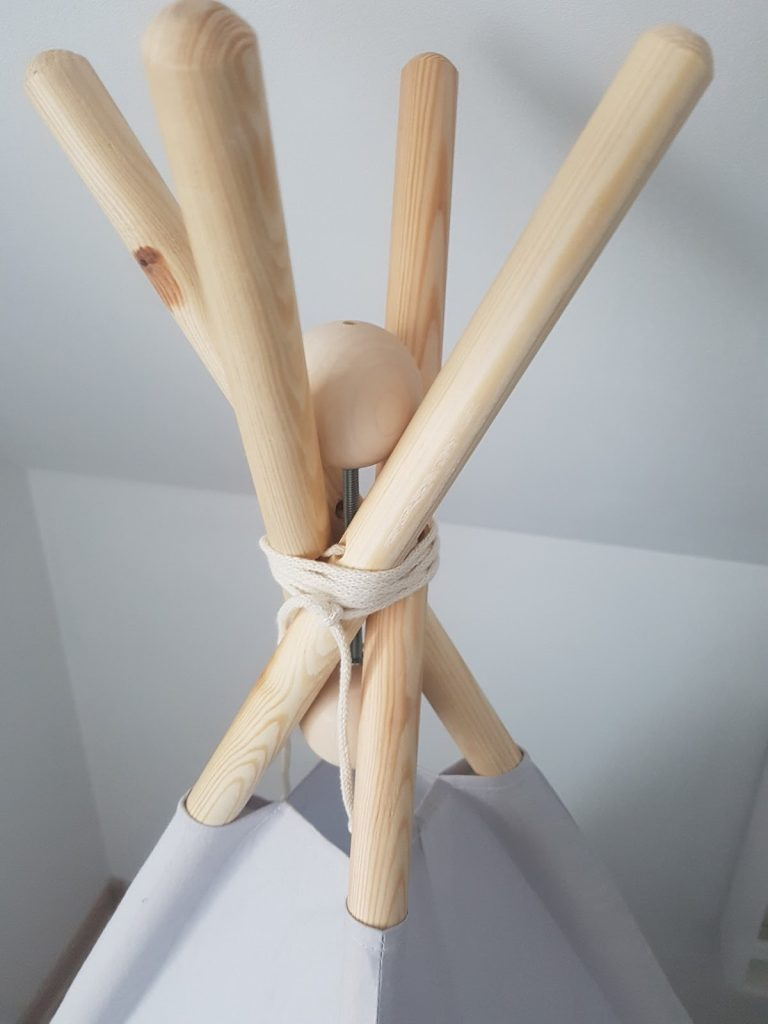
Feed the rope through each of the holes you’ve made in the dowels. When you’ve fed it through them all, wrap the rest of the rope around the poles to secure the top. Be sure to wrap the rope under, over, and through to keep them in position.
You could use some hot glue to keep the rope from sliding, but if you wrap it properly, that might not be necessary. However, if you find the rope slipping, hot glue is a good option. Just make sure the teepee can still fold for storage.
More: Best Backpacking Tent Under $100
Step 3: Shape your teepee
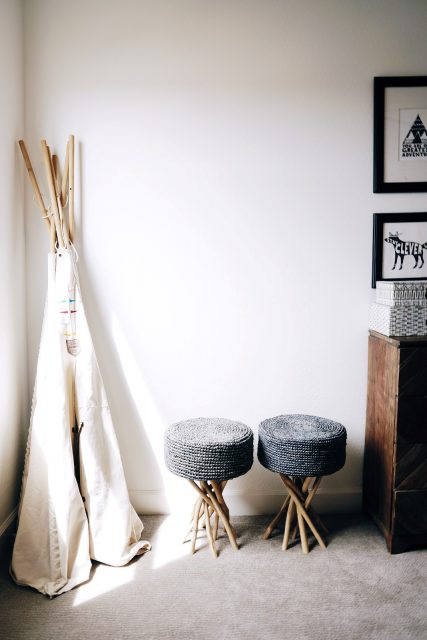
Now that you have your teepee frame, it’s time to add the canvas. Take your canvas and find the middle. Drape it over the back of your teepee frame, as if you were putting on its coat.
At the top, where the poles come together, drill a hole through the canvas and the pole. Place a washer and screw through the canvas and into the pole to hold it in place. After it’s secure, keep draping the fabric around the sides of your teepee.
Try to pull it tight around the poles and tuck the bottom underneath the frame. You can cut off the excess fabric later, but for now, your focus is on covering the frame snuggly with the canvas.
Secure the canvas on both sides by drilling holes in both the canvas and dowels. One hole on each side is sufficient. Add screws and washers on each side through the fabric to hold it to the teepee frame.
Step 4: Cut your fabric
After everything is together and you see how it all fits, you can make cuts to the bottom of the teepee canvas if you want to. You may also want to add pockets to the inside or a tie to the door. Both of these additions require a few sewing skills, but the adjustments are still relatively minor.
Here’s a video from SewVeryEasy which gives you some tips on adding pockets to your teepee:
Using the same simple sewing techniques, you can cut strips of fabric, clean up the edges, and add them to the front of your teepee. Doing so will keep the door closed. But you might not find that necessary, depending on the weight of your canvas.
More: How To Setup Pop-up Tent and fold it
The Kids Will Be Playing In No Time
Learning how to make a teepee tent doesn’t have to be hard. There are several ways to go about it, and some call for sewing. But if you want to put together a simple teepee in an hour or two, this no-sew teepee tent is the one for you.
Not only can you customize it to your liking, but it’s also affordable, and quick to put together. And the great thing is you can also use the teepee as is — no frills necessary.
And when your kids finish playing with their new teepee tent, it folds up neatly for easy storage.
What do you think of our step by step teepee tent guide? Let us know what you think in the comments below. And if you know someone who would love a teepee, feel free to share!
индивидуалки калуга эромассаж тайский эротический массаж в Калуге
Thanks for sharing. I read many of your blog posts, cool, your blog is very good.
Designed to adapt to side back and stomach sleep positions. Tap the link to explore -> psee.io/97b34e
The secret to instant cash? This game. 200% bonus live — use it now! Start Winning Here => psee.io/8r55hf